
Dell 3300MP Projector Special Lamp Installation
We have found that this lamp works in the Dell 3300MP projector. We have found a special situation where there was an installation problem with using this lamp. We recommend that you look at your original lamp and look at the instructions below before ordering the lamp. If your lamp is like our lamp then the installation is easy. If your lamp is like the below customers lamp then the below projector modifications are necessary to install the lamp. Below is copied directly from a customers email. There are two emails copied below, the first is the problem and the second is the solution.
Ron,
Again, thx for taking the initiative to returning my call on Sunday, August 17. Responses to the two action plans that we had discussed are as follows;
· The picture in ReplacementLightBulbs.com web site does not show the side of the “molding” that is at issue.
Following are two pictures for your review.
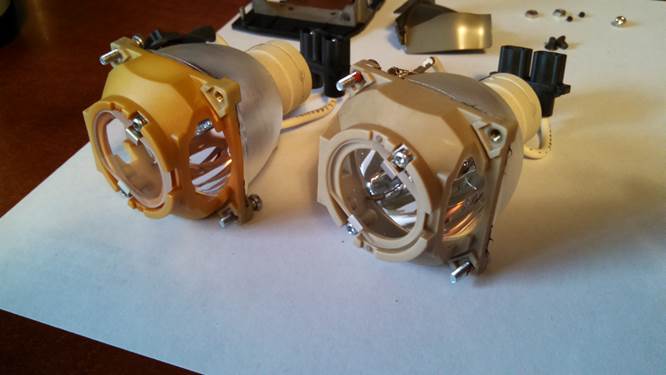
Yellow unit is Marden’s – lamp holder is “cut out” on left side (input side of the air flow) allowing the fully-assembled unit to be inserted into lamp compartment of the projector
Beige unit is RLB’s – RLB unit is not “cut out” on the left side (input side of the air flow); this “non-cut out” interferes with the fully-assembled being inserted into the lamp compartment of the projector
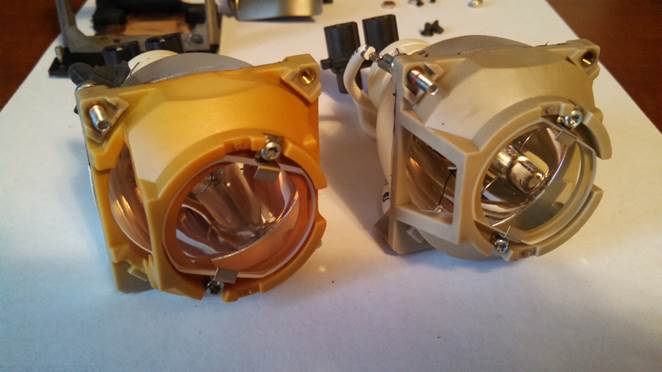
“cut out’s” for both the Yellow unit ( Marden’s) and the Beige unit (RLB’s) is the same – outlet side of the air flow; bulb molding is of the same configuration.
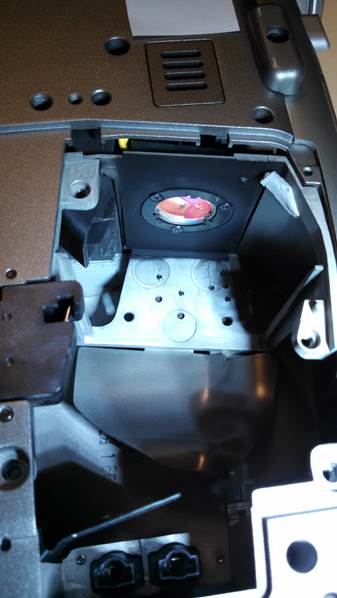
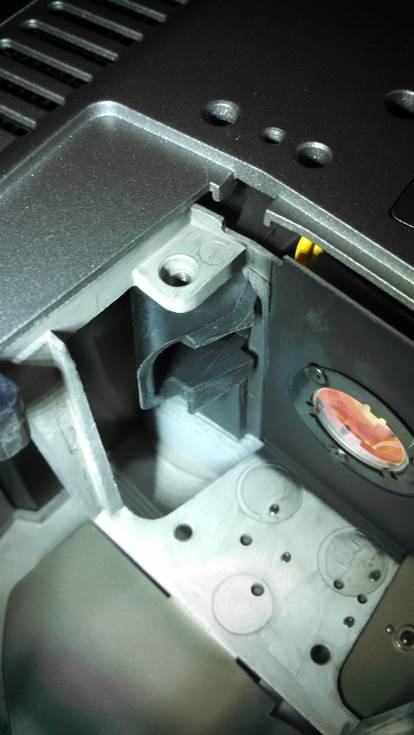
Assessment: After further review, following is my hypothesis. Dell had a bulb cooling issue (short circuiting of air flow) in the early model 3300MP. Dell either (1) modified the projector compartment in later models OR (2) just discontinued this model as it was manufactured only a few years. Subsequently, Osram improved the housing for the P-VIP xxxxx bulb to improve the air flow and discontinued the “yellow” molding. This updated configuration MAY have fit most older applications BUT NOT the Dell 3300MP. The purpose of the following picture is to show the air supply at the left of the “picture orientation lenses”. There are two molded “tabs” that are not allowing the “beige” housing/bulb unit to pass into the compartment.

Conclusion: intuitively, the RLB bulb (updated) housing provides less short circuiting of air flow, provides more air flow across the face of the bulb and thus removes more heat, and thus the bulb life is extended.
Action Plan: Marden is going to modify the projector compartment (remove the “tabs”) and allowing the RLB-furnished bulb to fit. The projector has faithfully served its time. The risk is little ……. the reward is great. This approach is somewhat based on spending a lot of time on trying to locate the “yellow” housing/bulb unit and not finding one.
Please advise if you should have any other thoughts.
Otherwise, I will let you know the outcome.
Regards.
Ron
Ron,
Alteration of our Dell 3300MP was successful. The “beige” assembly fits nicely.
However, the bulb may not have been the “root cause” of the issue. Subsequently, I have found symptoms of a failed color wheel (it can actually be seen in the 1st picture below) and determined, later, that it had totally failed. Do not know if a color wheel failure will disable the bulb from being “powered”.
Also, I have surfaced (at least) someone else on the internet who has posted the same issue with the “beige” bulb assembly ……. searching for a solution!
Marden’s procedure as follows;
· Using a sharp utility knife (new blade), small LED flashlight, and canned compressed air
· Carefully and repeatedly, score the 1st accessible, molded plastic “tab” that interferes with the installation of a “beige” bulb assembly
· Conduct the same for the next “tab”
· Keep track of the small scored pieces of the taps and remove them from inside of the projector
· Tip the unit over and remove any pieces that may get “away” (i.e. gently shake the projector)
· Conduct a light and careful internal cleaning of the projector with canned compressed air
· Install the new bulb assembly and test the unit
Pre “tabs” removal
After first tab” removal
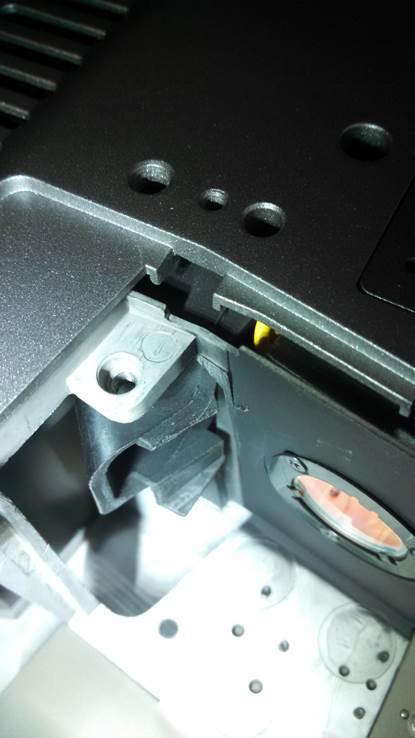
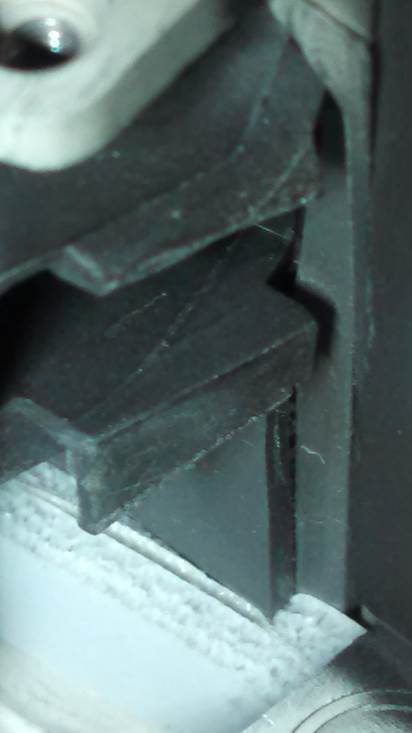
After 2nd “tab” removal (i.e. both tabs removed)
Both “tabs” removed (close up).
I am stubbornly going to continue to resurrect this old projector. It may not have been the bulb to begin with. But, only time will tell.
You may use this information however it may benefit your business.
Thx for your help.
Regards.
Ron
Replacementlightbulbs.com
800 Burton Avenue, Suite 107
High Point, NC 27262
336-882-BULB (2852)
Order Line: 800-692-3051
Technical Support Line: 336-882-2854
Fax Line: 336-882-2819
Hours: 8 AM to 4 PM EST Monday through Friday
Sales: Address
changes, invoice copies, tracking and delivery confirmation numbers,
order status, product availability, payment options, shipping quotes,
returns, damage claims
336-882-2852
sales@replacementlightbulbs.com
336-882-2854
support@replacementlightbulbs.com
International Orders:
Large international orders that require special shipping arrangements
and quotes
in@replacementlightbulbs.com
If you have compliments, complaints, suggestions, or help with areas not listed above please contact:
Ron MillerGeneral Manager
ron@replacementlightbulbs.com